
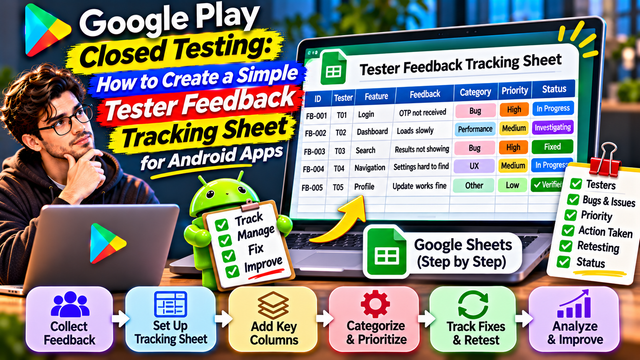
Learn how to create a simple Android app tester feedback tracking sheet in Google Sheets or Excel. Track tester comments, bugs, priorities, fixes, and retesting results during Google Play Closed Testing.
During Google Play Closed Testing, developers receive feedback from different testers using different Android devices, versions, and network conditions.
Some testers may report login problems, others may experience slow loading, and a few may suggest improvements to the app's design or navigation.
Managing all these comments through emails, WhatsApp messages, screenshots, and separate notes can quickly become confusing.
This is where a tester feedback tracking sheet becomes useful.
A simple tracking sheet helps developers collect feedback in one place, identify repeated problems, assign priorities, monitor fixes, and verify whether reported issues have been resolved.
You do not need expensive project management software to get started. Google Sheets or Microsoft Excel is enough for a basic Android app testing workflow.
In this guide, you will learn how to create a practical tester feedback tracking sheet, which columns to include, how to organize tester complaints, and how to use the information to improve your application before production.
1. What Is a Tester Feedback Tracking Sheet?
A tester feedback tracking sheet is a structured document used to record and manage feedback received during application testing.
It helps developers understand:
What problems testers experienced.
Which application features were tested.
Which devices were affected.
How frequently an issue was reported.
Which problems need immediate attention.
What actions developers have taken.
Whether the reported issues were successfully resolved.
For example, imagine that five testers report problems with your application's login process.
Without a tracking sheet, these complaints might remain scattered across different conversations.
With a tracking sheet, you can group the complaints, investigate their similarities, and identify whether they point towards a common problem.
The purpose is simple: turn scattered tester feedback into organized, actionable information.
2. Choose a Tool to Create Your Tracking Sheet
You can create your feedback tracker using several tools.
Tool
Best For
Main Advantage
Google Sheets
Individual developers and small teams
Easy sharing and collaboration
Microsoft Excel
Developers who prefer offline work
Powerful formulas and data management
Notion
Teams managing feedback alongside project tasks
Flexible organization
Trello
Visual issue tracking
Easy task status management
Recommended starting point: Google Sheets.
It is simple to use, supports filters and dropdowns, and allows multiple team members to update the same document.
You can also maintain separate tabs for tester information, feedback, bug reports, and testing summaries.
3. Create Your First Feedback Tracking Sheet
Start by opening Google Sheets and creating a blank spreadsheet.
Give your document a clear name, such as:
Android App Tester Feedback Tracker
Create a worksheet named Feedback Log.
This will be the main place where you record every useful tester comment.
Your first row should contain column headings.
Recommended columns:
Column
Heading
Purpose
A
Feedback ID
Unique reference for each report
B
Date Reported
Date the issue was received
C
Tester ID
Identifies the tester
D
App Version
Version being tested
E
Device Model
Device used by the tester
F
Android Version
Android version installed
G
Feature
Affected app feature
H
Feedback Description
Original tester comment
I
Issue Category
Bug, UX, performance, etc.
J
Priority
Critical, high, medium, or low
K
Assigned To
Person responsible
L
Action Taken
Investigation or fix
M
Status
Current progress
N
Retest Result
Outcome after retesting
O
Evidence
Screenshot or recording reference
These columns provide a useful starting structure without making the sheet unnecessarily complicated.
4. Understand What to Enter in Each Column
Adding headings is easy. Maintaining accurate information is what makes the tracker useful.
Here is how to complete the important fields.
Feedback ID
Give every feedback report a unique reference.
Examples:
FB-001
FB-002
FB-003
This makes it easier to discuss an issue without repeatedly searching for the original comment.
Date Reported
Record when the feedback was received.
This helps you understand when an issue first appeared and how long it has remained unresolved.
Tester ID
Use a reference such as Tester 01 or Tester 02.
Avoid displaying unnecessary personal information in a shared tracker.
App Version
Record the exact version used during testing.
For example: 1.0.2.
This helps identify whether an issue belongs to an older release or still exists in an updated build.
Device Model and Android Version
Record the device and operating system information whenever it is relevant to the reported problem.
Feedback Description
Keep the tester's original comment as accurately as possible.
For example:
"The dashboard takes too long to open after login."
Issue Category
Classify the comment so similar reports can be grouped.
Priority
Decide how urgently the issue needs attention.
Action Taken
Record what the development team investigated, changed, or fixed.
Status
Track the current progress of the issue.
Retest Result
Record whether the updated application behaves as expected.
5. Add Issue Categories to Organize Feedback
One of the most useful features of a feedback tracker is categorization.
Testers may describe the same problem using different words.
For example:
The app opens slowly.
The dashboard takes too long.
The loading screen stays visible.
The application freezes while loading.
These comments may be related to performance.
Create consistent categories to organize feedback.
Recommended categories:
Category
Example Feedback
Login and Registration
OTP verification fails
Performance
Dashboard loads slowly
UI and Design
Text is difficult to read
Navigation
Users cannot find settings
Technical Bug
App crashes unexpectedly
Compatibility
Feature fails on a particular device
Notifications
Notifications are not received
Feature Request
Tester requests dark mode
Security
Unexpected access or permission behaviour
Do not automatically assume that similar comments have the same technical cause. Categorization helps you identify patterns, but developers must still investigate the actual problem.
6. Create Priority Levels for Reported Issues
Not every complaint needs immediate attention.
A minor visual inconsistency should not automatically receive the same priority as an application crash or a failed payment.
Create a priority column with four levels.
Priority
Meaning
Example
Critical
Serious issue affecting essential functionality or security
App crashes during login
High
Important feature is not working correctly
Registration fails
Medium
Noticeable usability or performance issue
Navigation is confusing
Low
Minor improvement or visual refinement
Button colour suggestion
Prioritize issues based on:
Severity of the problem.
Number of users affected.
Impact on important app functions.
Whether the problem can be reproduced.
Potential consequences if left unresolved.
A single critical issue may deserve more attention than ten minor design suggestions.
7. Add Dropdown Menus to Make the Sheet Easier to Use
Typing different versions of the same status can make your spreadsheet messy.
For example:
In progress
In Progress
Working
Under process
Development ongoing
These labels may mean similar things, but they make filtering difficult.
Use dropdown menus to keep information consistent.
In Google Sheets:
Select the cells in the column.
Open Insert → Dropdown or use Data → Data validation.
Add your preferred options.
Save the dropdown settings.
Recommended dropdown values:
Issue Category
Technical Bug
Performance
Login and Registration
UI and Design
Navigation
Compatibility
Feature Request
Security
Priority
Critical
High
Medium
Low
Status
New
Under Investigation
In Progress
Fixed
Ready for Retesting
Verified
Deferred
Retest Result
Passed
Failed
Partially Passed
Not Tested
Using dropdowns makes your tracking sheet more consistent and easier to maintain.
8. Add Sample Tester Feedback Entries
To understand how the sheet works, consider this example of a shopping application undergoing closed testing.
Feedback ID
Tester
Feature
Feedback
Priority
Status
FB-001
Tester 01
Login
OTP verification fails
High
In Progress
FB-002
Tester 02
Dashboard
Dashboard loads slowly
Medium
Investigating
FB-003
Tester 03
Search
Search results do not appear
High
New
FB-004
Tester 04
Navigation
Settings are difficult to find
Medium
New
FB-005
Tester 05
Profile
Profile updates successfully
Low
Verified
These are illustrative entries.
Notice that not every tester comment represents a bug. A successful feature test can also be useful to record, especially when you want to maintain a broader testing summary.
9. Create a Separate Sheet for Tester Information
Keeping tester details separate from individual feedback reports makes the workbook easier to manage.
Create another worksheet named Tester Details.
Recommended columns:
Tester ID
Opt-in Status
Installation Status
Device
Android Version
Feedback Received
Tester 01
Yes
Installed
Samsung
Android 14
Yes
Tester 02
Yes
Installed
OnePlus
Android 15
Yes
Tester 03
Yes
Installed
Redmi
Android 13
Pending
Tester 04
Yes
Installed
Pixel
Android 15
Yes
This sheet helps you organize:
Tester references.
Opt-in information.
Installation status.
Device information.
Feedback participation.
Testing progress.
Do not treat opt-in status as proof of engagement. Record actual testing observations separately.
10. Create a Bug Tracking Worksheet
For larger applications, you may want to separate general feedback from technical bugs.
Create a third worksheet named Bug Tracker.
Include these columns:
Column
Information
Bug ID
Unique issue reference
Reported Date
Date discovered
Feature
Affected functionality
Problem Description
What went wrong
Steps to Reproduce
How to repeat the issue
Expected Result
What should happen
Actual Result
What happened
Priority
Severity level
Developer
Assigned person
Fix Version
Version containing the proposed fix
Retest Result
Outcome of verification
Final Status
Current resolution state
This structure is particularly useful when several developers are working on the same application.
It prevents important technical issues from getting lost among general suggestions and design preferences.
11. Use Simple Formulas to Track Feedback
Google Sheets and Excel allow you to calculate useful statistics automatically.
For example, suppose your main feedback data is stored in a worksheet named Feedback Log, with:
Column A: Feedback ID
Column I: Issue Category
Column J: Priority
Column M: Status
You can use these formulas.
Total Feedback Reports
=COUNTA('Feedback Log'!A2:A)
Total High-Priority Issues
=COUNTIF('Feedback Log'!J2:J,"High")
Total Critical Issues
=COUNTIF('Feedback Log'!J2:J,"Critical")
Total Open Issues
=COUNTIF('Feedback Log'!M2:M,"New")+COUNTIF('Feedback Log'!M2:M,"Under Investigation")+COUNTIF('Feedback Log'!M2:M,"In Progress")
Total Verified Issues
=COUNTIF('Feedback Log'!M2:M,"Verified")
These formulas help you understand the current status of your testing feedback.
Make sure your worksheet names and column positions match the formulas.
12. Add Filters to Find Important Feedback Quickly
When your application receives dozens or hundreds of feedback reports, manually searching every row becomes inefficient.
Use filters to find the information you need.
In Google Sheets:
Select your heading row and data range.
Open Data → Create a filter.
Use the filter icons in your column headings.
Select the category, priority, tester, or status you want to review.
For example, you can filter:
All critical issues.
All unresolved login problems.
All complaints from Samsung devices.
All feedback related to performance.
All issues waiting for retesting.
This makes it easier to identify which problems need attention.
13. Create a Simple Feedback Dashboard
If you want a quick overview of your testing progress, create another worksheet named Dashboard.
Display a few important indicators:
Metric
Example
Total Feedback Reports
25
Critical Issues
2
High-Priority Issues
5
Issues Under Investigation
4
Fixed Issues
8
Verified Issues
6
You can also create charts showing:
Feedback by category.
Issues by priority.
Reports received by app version.
Open versus verified issues.
Use pivot tables or formulas to calculate these figures from your feedback log.
A dashboard should summarize the underlying records, not replace them.
14. Follow a Simple Workflow for Every New Feedback Report
Creating a tracking sheet is only useful if your team updates it consistently.
Use this workflow whenever a tester submits feedback.
Step 1: Collect
Receive the feedback through Google Play's private testing feedback feature or your chosen feedback channel.
Step 2: Record
Add the original comment and relevant testing details to the feedback log.
Step 3: Categorize
Identify whether the report concerns a technical bug, performance, usability, compatibility, or a feature request.
Step 4: Investigate
Try to reproduce the problem and identify its root cause.
Step 5: Prioritize
Decide how urgently the issue needs attention.
Step 6: Fix
Assign the issue and implement the required change.
Step 7: Retest
Test the updated application using the original reproduction steps.
Step 8: Update
Record the result and change the issue status accordingly.
The workflow looks like this:
Collect → Record → Categorize → Investigate → Prioritize → Fix → Retest → Verify
15. How to Use Your Tracking Sheet Before Google Play Production Access
Your feedback tracking sheet can help you prepare for the Production Access application.
Google asks developers to explain their closed testing experience, including tester recruitment, engagement, feedback collection, and changes made based on testing.
Your records can help you prepare accurate answers.
For example:
Question: What feedback did you receive during closed testing?
Your tracker may show that several testers reported slow dashboard loading, while others found registration confusing.
Question: What changes did you make based on feedback?
Your records may show that the dashboard loading process was optimized and the registration instructions were improved.
Question: How did you determine that your app was ready for production?
Your documentation may show that important workflows were tested again, reported issues were investigated, and the updated application was evaluated on relevant devices.
Do not simply copy spreadsheet statistics into your application. Review the original feedback and actual testing results before preparing your answers.
The tracking sheet is supporting documentation, not a replacement for genuine tester engagement or a guarantee of production approval.
16. Common Mistakes to Avoid When Creating a Feedback Tracker
Mistake
Better Approach
Creating too many unnecessary columns
Start with essential information
Recording vague complaints
Preserve original comments and add reproduction steps
Mixing all feedback into one category
Use consistent issue categories
Forgetting app versions
Record the exact version for each report
Using inconsistent status labels
Create dropdown menus
Ignoring repeated complaints
Group similar reports and investigate patterns
Marking issues fixed without retesting
Verify the updated application
Keeping feedback in multiple places
Maintain one central tracking sheet
Sharing unnecessary personal details
Use tester IDs and protect sensitive information
Never updating the tracker
Review it regularly during testing
17. Final Checklist: Build Your Android App Feedback Tracker
Use this checklist when setting up your spreadsheet.
Workbook Setup
Create a Google Sheets or Excel workbook.
Add a clear document name.
Create a Feedback Log worksheet.
Create a Tester Details worksheet.
Create a Bug Tracker worksheet if needed.
Create a Dashboard worksheet if useful.
Feedback Management
Add unique feedback IDs.
Record the date of each report.
Record the app version.
Record relevant device information.
Preserve the original tester comment.
Add an issue category.
Assign priority levels.
Record investigation details.
Track actions taken.
Record retesting results.
Spreadsheet Features
Add dropdown menus.
Enable filters.
Use consistent status labels.
Add basic counting formulas.
Create a summary dashboard if needed.
Protect the workbook from accidental edits.
Testing and Reporting
Review new feedback regularly.
Identify repeated complaints.
Investigate important issues.
Record fixes and updated versions.
Verify important changes.
Prepare an accurate testing summary.
Conclusion
A tester feedback tracking sheet is one of the simplest ways to organize your Android app testing process.
It helps developers move beyond scattered messages and create a structured record of tester experiences, technical problems, suggestions, development actions, and retesting results.
You do not need a complicated system to get started.
A well-organized Google Sheet with clear columns, consistent categories, and regular updates can make your entire closed testing process easier to manage.
Remember:
Collect feedback, organize the information, track every important issue, and verify every meaningful improvement.
The goal is not to create a spreadsheet just to show that testing happened. The goal is to use the information to build a better application before production.
Frequently Asked Questions (FAQs)
1. What is a tester feedback tracking sheet?
It is a spreadsheet used to collect, organize, and monitor feedback received from application testers. It helps developers track reported issues, priorities, fixes, and retesting results.
2. Can I use Google Sheets for Android app testing?
Yes. Google Sheets is suitable for managing tester feedback, issue categories, device details, development tasks, and testing progress.
3. What columns should a tester feedback sheet include?
Useful columns include feedback ID, date, tester ID, app version, device model, Android version, feature, feedback description, category, priority, action taken, status, and retest result.
4. Should I create a separate bug tracker?
For small applications, one feedback sheet may be enough. For larger applications or development teams, a separate bug tracker makes technical investigations and fixes easier to manage.
5. How do I identify repeated tester complaints?
Group feedback by category and affected feature. Compare similar comments, investigate their root causes, and prioritize problems according to severity and impact.
6. Is a tester feedback tracking sheet mandatory for Google Play?
Google does not prescribe a particular spreadsheet template. However, maintaining organized records is a useful practice for managing testing and preparing accurate Production Access answers.
7. Can I use my tracking sheet to prepare Production Access answers?
Yes. It can help you summarize feedback received, issues identified, changes made, and retesting results. Make sure all information reflects actual testing activity.
8. How often should developers update the tracking sheet?
Update it whenever new feedback is received, an issue changes status, a fix is released, or retesting is completed. Regular updates prevent important information from being lost.
About the Author

Saksham Goyal
Expert software tester and contributor to the community. Passionate about AI, automation, and user experience.