
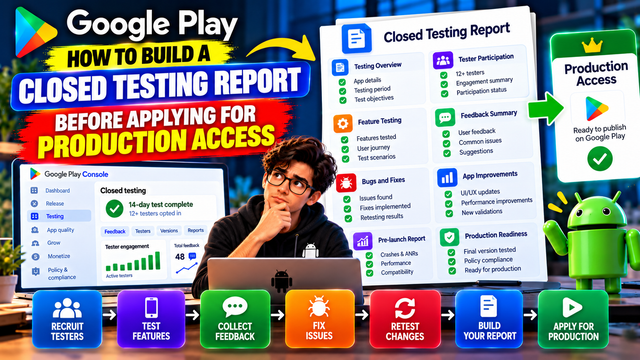
Learn how to create a Google Play Closed Testing Report covering tester participation, feature testing, feedback, bugs, fixes, retesting, and production readiness.
Completing a Google Play Closed Test is only one part of preparing for Production Access.
For personal developer accounts created after November 13, 2023, Google requires a closed test with at least 12 testers continuously opted in for at least 14 days before you can apply for Production Access. Completing those numbers does not automatically guarantee Production Access. Google also asks about tester engagement, feedback, app readiness, and what you changed based on testing.
That is why creating a Closed Testing Report before applying can be extremely useful.
A good report gives you a structured record of what happened during testing and makes it easier to prepare accurate answers for the Production Access questionnaire.
What Is a Google Play Closed Testing Report?
A Closed Testing Report is a structured record of your testing campaign.
It should explain:
Who participated in the test
How testers were recruited
How long they remained opted in
Which features they tested
What feedback they provided
What problems were discovered
What changes you made
Whether important fixes were retested
What you learned from testing
Why you believe the app is ready for production
Google's Production Access process asks developers about their closed test, tester engagement, feedback, changes made from testing, and production readiness.
Your report should capture these details while the testing information is still fresh.
Why Should You Create a Testing Report?
You might think:
"Google already has the testing data. Why do I need a report?"
Because remembering exactly what happened over 14 days is not a particularly reliable database. Humans invented spreadsheets for a reason.
A report helps you:
1. Track Tester Participation
Record when testers joined and whether they remained continuously opted in.
2. Organize Feedback
Keep tester comments, bug reports, suggestions, and observations in one place.
3. Track Fixes
Connect tester feedback to changes made in your app.
4. Prepare Production Access Answers
Google asks developers to describe tester recruitment, engagement, feedback, and changes made as a result of testing.
5. Identify Weaknesses
A report can reveal that testers installed your app but barely explored its features.
Finding that weakness before applying is considerably better than discovering it after Google asks for more testing.
What Should Your Closed Testing Report Include?
A practical report can be divided into eight main sections.
1. Testing Overview
Start with basic information about your campaign.
Item
Details
App Name
Your application name
Package Name
Android package ID
Testing Track
Closed Testing
Testing Start Date
Date testing began
Testing End Date
Date testing ended
Testing Duration
14+ days where applicable
Minimum Testers
12
Actual Testers
Number who participated
App Version
Version tested
Testing Objective
What you wanted to validate
This provides a quick overview of the campaign.
2. Tester Recruitment
Document how you found your testers.
Google asks about the process you used to recruit testers as part of the Production Access application.
Record:
Recruitment method
Number of people invited
Number who accepted
Number who opted in
Communication method
Instructions provided
Feedback channel
For example:
We recruited testers through our existing user and professional network. Testers received instructions explaining how to join the closed test, which features to explore, and where to report issues.
Keep this factual.
The purpose is to document your testing process, not write a heroic origin story about twelve people bravely installing an APK.
3. Tester Participation
Create a simple participation table.
Tester
Opted In
Testing Status
Feedback Received
Tester 01
Yes
Completed
Yes
Tester 02
Yes
Completed
Yes
Tester 03
Yes
Completed
Yes
Tester 04
Yes
Completed
Yes
Tester 05
Yes
Completed
Yes
You don't need to expose unnecessary personal information in your internal report.
Use identifiers such as Tester 01, Tester 02, Tester 03.
Most importantly, record what actually happened.
Don't manufacture tester activity simply to make the report look impressive.
4. Feature Testing Report
This is one of the most important sections.
Google asks whether testers used the available features and whether their usage reflected expected production behavior.
Create a feature-testing matrix.
Feature
Tested?
Issues Found
Action Taken
Retested?
Registration
Yes
Validation issue
Fixed
Yes
Login
Yes
None
No changes
Yes
Dashboard
Yes
UI issue
Updated layout
Yes
Search
Yes
Slow results
Optimized
Yes
Notifications
Yes
Delay
Fixed
Yes
Profile
Yes
Minor UI issue
Improved
Yes
This is much stronger than simply writing:
"All features were tested."
Explain what was tested and what happened.
5. Tester Feedback Summary
Google asks developers to summarize feedback received during testing and explain how the feedback was collected.
Your report should therefore include a feedback summary.
Example: Login Experience
Tester feedback:
Some testers found the login process confusing.
Action:
Improved the login screen and clarified error messages.
Retest:
Testers repeated the login flow after the update.
Example: Navigation
Tester feedback:
Testers had difficulty finding the settings section.
Action:
Updated navigation and improved the placement of the settings option.
Retest:
Testers checked the revised navigation.
Example: Performance
Tester feedback:
The dashboard took longer to load on slower connections.
Action:
Optimized API requests and reduced unnecessary loading operations.
Retest:
The dashboard was tested again under slower network conditions.
6. Bugs and Fixes
Create a dedicated bug-tracking section.
Issue
Severity
Fix
Status
Login failure
High
Authentication fix
Resolved
Slow dashboard
Medium
Performance optimization
Resolved
UI alignment
Low
Layout update
Resolved
Notification delay
Medium
Notification logic updated
Resolved
This helps show that testing was used to improve the application rather than simply collect installations.
Google's closed-testing guidance also recommends providing testers with a way to submit feedback and using testing to identify issues before launch.
7. Retesting and Validation
After fixing an issue, record whether the change was tested again.
A useful cycle looks like this:
Feedback → Issue Identified → Fix Released → Tester Retests → Result Documented
For example:
Testers reported an issue with the registration process. The validation logic was updated in the next test release. Testers repeated the registration flow, and the issue was no longer reproduced.
This gives your testing campaign a clear improvement cycle.
8. Production Readiness
Your final section should explain why you believe the app is ready.
Review:
Core functionality
Main user journey
Important features
Tester feedback
Bug fixes
Retesting
App stability
Store listing information
Policy requirements
Production configuration
Google asks developers to explain what changes were made based on testing and how they determined that the app was ready for production.
Add a Pre-Launch Report Summary
Your report should also include a technical review.
Google recommends using pre-launch testing to identify issues before releasing an app publicly.
Record:
Crashes: Reviewed
ANRs: Reviewed
Performance: Reviewed
Compatibility: Reviewed
Sign-in: Tested
Critical issues: Resolved or documented
If an issue remains unresolved, document it honestly and determine whether it affects production readiness.
Where to Find Tester Feedback in Play Console
Google Play Console provides testing feedback tools that allow developers to review feedback from testers.
You can also provide testers with a dedicated feedback channel such as email, a website, or a forum. Google specifically recommends offering a way for closed-test participants to provide feedback.
Keep your feedback records organized throughout the testing period instead of trying to reconstruct everything on Day 14.
Use a Testing Platform to Organize Your Campaign
Managing testers manually can become difficult, particularly for solo developers.
A platform such as inTesters is designed around Android app testing and Google Play closed-testing workflows. Its platform provides testing campaign management, tester participation tracking, structured feedback, and device/testing information.
If you're interested in understanding the workflow before using a service, the inTesters testing process explains how its community and professional testing paths work, including campaign monitoring and feedback collection.
The important point is that a testing platform should support genuine testing and useful feedback, not simply produce a tester count.
No third-party service can guarantee Google's Production Access decision.
Example Closed Testing Report Structure
You can organize your final document like this:
Google Play Closed Testing Report
1. App Information
App name
Package name
Version
Testing track
2. Testing Period
Start date
End date
Duration
3. Tester Recruitment
Recruitment method
Number invited
Number opted in
Communication channel
4. Tester Engagement
Features tested
Main user journeys
Testing scenarios
Feedback activity
5. Feedback Summary
Major feedback
Minor feedback
Common themes
6. Bugs Identified
Issue
Severity
Date discovered
Resolution
7. Changes Made
Feature changes
Bug fixes
UX improvements
Performance improvements
8. Retesting
Fixes retested
Results
Remaining issues
9. Technical Validation
Crashes
ANRs
Pre-launch findings
Compatibility
10. Production Readiness
Why the app is ready
What was learned
What changed during testing
A Simple One-Page Testing Summary
You don't need to create a 30-page document unless your app is complicated enough to deserve one.
Create a one-page summary as well.
Closed Test Summary
Testing Period: 14 days
Testers Opted In: 15
Primary Features Tested: Registration, Login, Dashboard, Search, Notifications
Feedback Collected: 18 observations
Major Issues Found: 3
Major Issues Resolved: 3
Retesting Completed: Yes
Pre-launch Report Reviewed: Yes
Production Readiness: Core functionality validated and identified issues addressed
Then keep the detailed records behind it.
Don't Make These Reporting Mistakes
Mistake 1: Reporting Only Tester Count
"12 testers completed 14 days."
That's useful, but incomplete.
Explain what they actually tested.
Mistake 2: Inventing Feedback
Never create fake feedback to make the report look impressive.
If feedback was limited, document that honestly.
Mistake 3: Claiming Every Feature Was Tested
If your app has 25 features and testers only used five, don't write:
"All features were thoroughly tested."
Your report should reflect reality.
Mistake 4: Ignoring Negative Feedback
Negative feedback isn't automatically bad.
Finding a problem during testing is much better than discovering it after thousands of users install the production version.
Mistake 5: Forgetting Retesting
A bug fix without validation is only half a testing cycle.
Record whether important fixes were tested again.
Mistake 6: Treating 14 Days as the Entire Goal
The testing period is not simply a timer you need to survive.
The purpose is to gather useful feedback, identify problems, improve the app, and evaluate whether it is ready for production.
Google can require additional testing when it determines that more testing is needed.
Final Checklist Before Applying for Production Access
Before submitting your application, review your report:
Testing period completed
At least 12 testers continuously opted in for the required period
Tester recruitment documented
Tester engagement documented
Core features tested
Main user journey tested
Feedback collected
Feedback summarized
Important bugs documented
Relevant bugs fixed
Important fixes retested
Latest build reviewed
Pre-launch results checked
Policy requirements reviewed
Production Access answers prepared
Production readiness explanation written honestly
Final Thoughts
A Google Play Closed Testing Report shouldn't be something you create five minutes before applying for Production Access.
Build it during the testing period.
Record tester participation. Track feature testing. Capture feedback. Document bugs. Record fixes. Retest important changes. Review technical results.
Then, when Google asks what happened during your closed test, you aren't trying to reconstruct two weeks of activity from memory.
You already have it organized.
The workflow is simple:
Recruit → Test → Collect Feedback → Fix → Retest → Document → Review → Apply
If managing testers is becoming difficult, inTesters provides a dedicated platform for organizing Android testing campaigns, including tester tracking and structured feedback.
The goal isn't simply to complete the testing period.
The goal is to use the testing period to demonstrate that your app has been meaningfully tested, improved, and prepared for real users.
FAQs
1.Is a Closed Testing Report required by Google?
Google's published Production Access process asks questions about your closed test, tester engagement, feedback, changes made from testing, and production readiness. Google does not describe a separate formal "Closed Testing Report" document as a mandatory submission. Creating one is a practical way to organize the information you need.
2.How many testers should I include in the report?
For affected personal developer accounts, at least 12 testers must be continuously opted in for at least 14 days before applying for Production Access. Your internal report can document the broader tester group and participation history.
3.What feedback should I include?
Include genuine observations about usability, bugs, performance, confusing workflows, missing functionality, and other issues testers actually reported. Also document what you did in response.
4.Should I include screenshots?
Screenshots can be useful for documenting bugs, UI problems, and before-and-after changes. They don't replace accurate answers in the Production Access application.
5.Can I apply immediately after completing 14 days?
Once the applicable testing criteria are met, you can apply through Play Console. However, completing the testing period does not guarantee Production Access. Google evaluates the information provided and the app's readiness.
6.Can inTesters guarantee Production Access?
No. inTesters can help organize the testing process, but Google makes the final Production Access decision. The service itself also states that professional testing is intended to help developers manage the testing process rather than guarantee Google's approval.
About the Author

Saksham Goyal
Expert software tester and contributor to the community. Passionate about AI, automation, and user experience.