
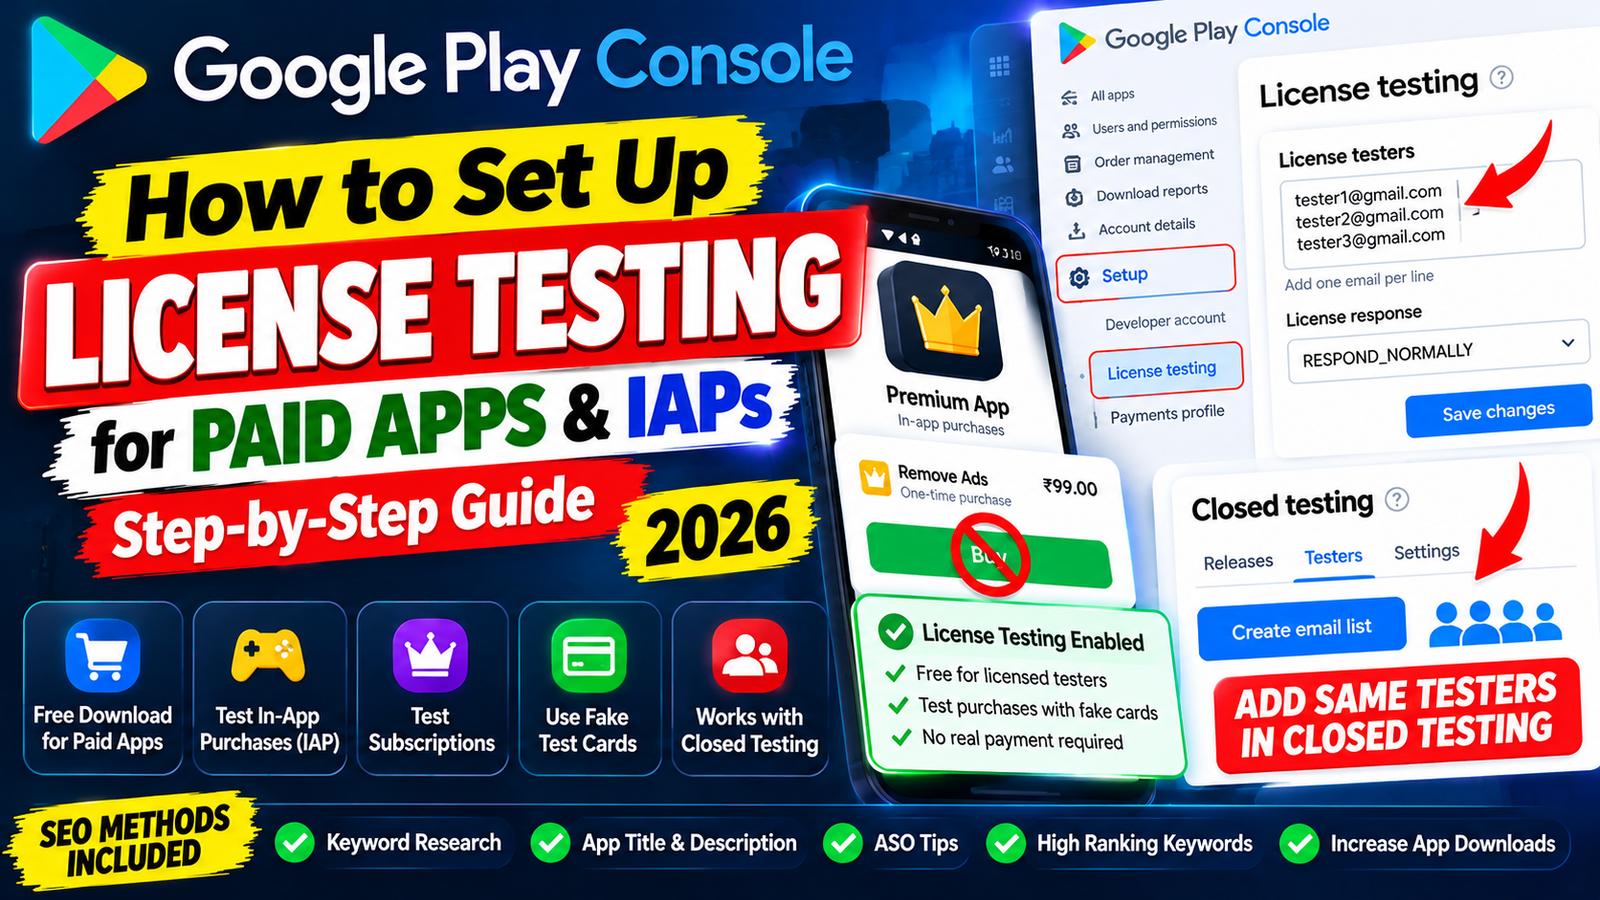
Setting up License Testing in the Google Play Console allows you to evaluate paid apps and in-app billing features without incurring real charges. Add your testers' Gmail accounts under Setup > License testing, add those same emails to your Closed testing track, and share your web opt-in link. Manage your 14-day testing track with professional discipline to transition smoothly from pre-launch testing straight to public release.
If you are developing a paid Android application or implementing in-app purchases (IAPs) and recurring subscriptions, you know that testing financial workflows can be a major nightmare.
Normally, when you upload a paid app to a Closed Testing track on the Google Play Console, testers who click your opt-in link are still required to pay the full store price or make real credit card payments to test your checkout screens.
This is where License Testing comes in. By configuring License Testing in your console settings, you allow designated testers to download paid builds completely free of charge and process simulated in-app purchases using fake "Test Cards" without spending real money.
However, many developers get confused about how License Testing connects with Closed Testing, how to add tester emails properly, and why their closed testing tracks get rejected.
This guide details how to configure License Testing step-by-step, explains why it is vital for paid app monetization, and provides a clear strategy to clear Google's mandatory pre-launch quality checks on your first try.
What Is License Testing? (And Why Paid Apps Need It)
In the Google Play ecosystem, License Testing is a developer tool that grants specific Google accounts special testing privileges across your entire console.
When an account is added to your License Testing list:
Free Downloads for Paid Apps: Testers can install paid applications on Closed or Internal testing tracks without being charged the upfront purchase price.
Simulated In-App Purchases (IAP): Testers can trigger in-app checkout flows using zero-cost "Test Instrument" cards (e.g., Test card that always approves or Test card that declines) to test purchase states, refunds, and subscription renewals without real financial transactions.
Debug Build Verification: Developers can test Play Billing APIs directly on debug builds sideloaded to a physical test phone signed into a licensed account.
Closed Testing vs. License Testing: The Core Distinction
It is crucial not to confuse your Closed Testing Track List with your License Testing List:
Closed Testing List: Grants permission to access the private Play Store testing URL and install the
.aabpackage. (Does NOT bypass payment screens for paid apps).License Testing List: Tells Google Play's billing engine to bypass real payment charges for the added email accounts.
For your closed testers to test a paid app or in-app billing for free, their Google accounts must be added to BOTH sections inside your Play Console.
Step-by-Step: How to Add Testers to License Testing
Configuring License Testing is done at the global console level, making the permissions active across all your testing tracks.
Step 1: Open the License Testing Panel
Log into your Google Play Console.
Do not select an individual app. Instead, scroll down the main left-hand menu to the Setup section.
Click on License testing.
Step 2: Add Tester Email Addresses
Under the License testers section, locate the text entry box.
Enter the primary Gmail or Google Workspace email addresses of your testers. (Add one email per line or separate them using commas).
Make sure the email addresses match the exact Google accounts your testers use on their physical Android smartphones.
Step 3: Configure Test Responses
Under License response, you can choose how Google Play responds to purchase calls for these accounts:
RESPOND_NORMALLY(Default): Returns a standard success payload when using test payment cards.LICENSED/NOT_LICENSED: Simulates whether a user owns a valid app license.Scroll down to the bottom right and click Save changes.
Step 4: Link License Testers to Your Closed Testing Track
Now that your testers have billing permissions unlocked, you must grant them access to your actual application build inside your Closed Testing track.
Select your application from the Play Console home page.
Navigate to Testing > Closed testing on the left menu.
Click Manage track next to your active track (e.g., Alpha).
Select the Testers tab.
Under Select a testing method, choose Email lists (or Google Groups).
Click Create email list, enter your testers' email addresses (the exact same list added to License Testing), and save.
Copy your Opt-in URL (
[https://play.google.com/apps/testing/com.yourpackage.name](https://play.google.com/apps/testing/com.yourpackage.name)) and share it with your testers.
The Mandatory 14-Day Closed Testing Gate
If your personal developer account was registered after November 2023, setting up License Testing is only a partial step. Before Google unlocks your Production track and allows you to sell your app to the public, you must fulfill Google's mandatory pre-launch quality gate:
You must recruit a minimum of 12 verified testers who keep your app bundle (.aab) installed and actively test it for 14 consecutive, uninterrupted days.
Why Closed Testing Tracks Get Rejected (And How to Solve It)
Many indie developers set up their closed tracks, wait out 14 days, submit their Production Access Questionnaire, and immediately receive a rejection notice stating: "Your app requires more testing before it can be pushed to production."
Understanding the main reasons behind these rejections helps you avoid launch delays:
1. The "Ghost Tester" Trap
Relying on casual friends or "install-swap" groups on Reddit or Facebook often results in testers downloading your app on Day 1, opening it once for 3 seconds, and never touching it again. Google tracks background user session depth and screen interactions via Play Services. Inactive installs signal an artificial test track to manual reviewers.
2. Mid-Cycle Uninstalls and Broken Streaks
If a tester deletes your app on Day 10 to clear storage space on their phone, your active count drops below 12. Your 14-day consecutive streak breaks, and the Play Console timer resets back to Day 1.
3. Emulator and Bot Usage
Free swap pools often attempt to automate testing using desktop emulators or virtual machines. Google easily detects virtual device signatures, which can place your entire developer account standing at risk.
4. Vague Questionnaire Answers
When applying for production, you must answer a 10-question Production Access Questionnaire. Writing short, generic responses like "No bugs found, app works fine" triggers an immediate rejection.
The Solution: Deploy Managed Professional Testing
To eliminate the risk of a 14-day reset loop and ensure your paid app or in-app billing passes Google's production review on your first attempt, consider leveraging a managed professional closed testing platform like inTesters.
Instead of chasing down unreliable contacts or dealing with casual forum swaps, an enterprise testing framework handles compliance logistics end-to-end:
Guaranteed 14-Day Track Stability: Assigns 20+ verified testers for 16 continuous days—providing a safety buffer over Google's minimum 12-tester threshold to prevent streak resets.
100% Real Physical Android Hardware: Vetted testers evaluate your application across real physical devices (Samsung, Pixel, OnePlus, Xiaomi, etc.) spanning Android 11 through 15—never emulators.
Organic Deep User Telemetry: Testers launch your application daily, navigate submenus, test core features, and trigger license testing purchase screens for 2 to 3 minutes per session, generating the deep user telemetry Google evaluates.
AI-Verified Daily Proof Logs: Automated verification systems review daily visual proof screenshots to confirm authentic human engagement every single day.
Production Questionnaire Mapping: Receive detailed crash logs, compatibility reports, and feedback summaries to help you complete Google's 10-question Production Access Questionnaire accurately.
About the Author

Pratyush Kumar Thakur
Expert software tester and contributor to the community. Passionate about AI, automation, and user experience.