
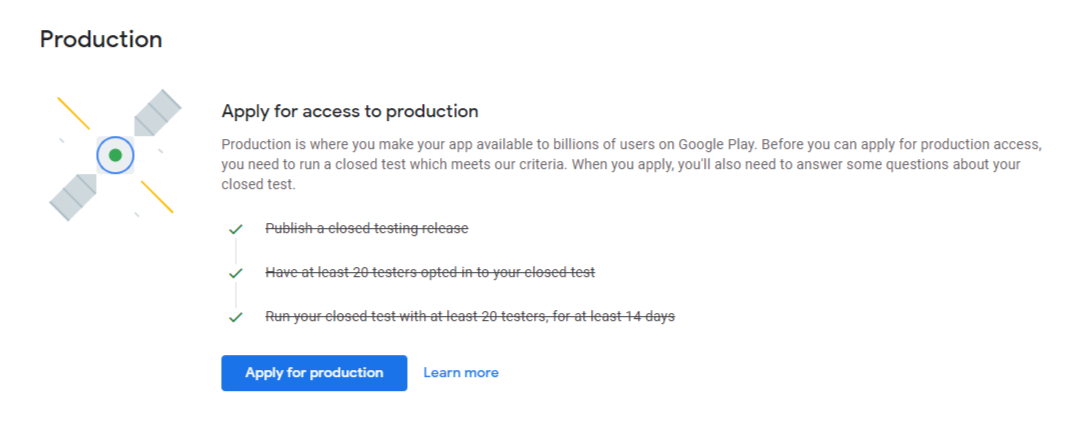
Don’t let poor test management delay your global launch. Sourcing “free” testers from Reddit or Facebook often leads to rejections, drop-offs, and wasted 14-day cycles, costing far more time than money saved. Treat your launch seriously: hire vetted, real-world testers early, collect clean user telemetry, and move confidently into production on the first try.
For Android developers , the path towards publishing in the Google Play Store shifted kinda dramatically when Google rolled out its strict testing requirements. If you’re using a personal developer account that was created after November 2023, you can’t just toss your app up and press “Publish” like before.
Instead, there’s a big compliance obstacle in the mix : the 14 day closed testing requirement.
Many developers approach this phase casually, treating it as a simple box to check. They recruit a few friends, wait two weeks, and apply for production access—only to be hit with a painful rejection stating their app requires "more testing." This forces them to restart the entire 14-day clock, wasting a month or more of valuable time.
To pass on your very first attempt, you need a rigorous, strategic approach. This ultimate guide breaks down exactly how to do 14 days closed testing for Google Play Console successfully, the telemetry metrics Google is tracking, and how to avoid the testing negligence that ruins most launches.
The Core Blueprint: What Google Actually Tracking
Google’s automated review systems do not just look at whether 12 email addresses are registered to your track. They actively monitor the user telemetry data generated by those devices. If the data looks artificial or stagnant, your production application will be denied.
When running your 14-day test, Google evaluates the following core metrics:
Metric tracked by Google: Tester Retention
The Danger Zone (Triggers Rejection): Dropping below 12 active users at any point due to sudden uninstalls.
The Target Profile (Ensures Approval): Keep 15–20 testers opted in to maintain a healthy safety buffer.
Metric tracked by Google: Session Duration
The Danger Zone (Triggers Rejection): Opening the app for 5–10 seconds and immediately closing it.
The Target Profile (Ensures Approval): Consistent daily sessions lasting at least 2–3 minutes per tester.
Metric tracked by Google: Depth of Exploration
The Danger Zone (Triggers Rejection): Sticking entirely to the splash screen or login page.
The Target Profile (Ensures Approval): Testers navigate every page, click buttons, and trigger events.
Metric tracked by Google: Device Environment
The Danger Zone (Triggers Rejection): Relying on emulators, virtual devices, or automated web testing bots.
The Target Profile (Ensures Approval): 100% of testing on real, physical Android smartphones and tablets.
Step-by-Step Guide to Executing a Flawless Closed Test
Step 1: Initialize Your Closed Testing Track
Open your Google Play Console and select your application.
In the left sidebar, scroll to the Testing section and click on Closed testing.
Click Create track (usually labeled as your Alpha track).
Go into the Testers tab, pick Email lists, and make up a dedicated list with the exact Gmail addresses of your testers . Try not to mix them, keep it clean, ok.
Provide a valid email address or URL in the Feedback URL field so users can report bugs.
Step 2: Upload Your App Bundle and Await Review
Click Create new release in your closed track.
Upload your signed production ready Android App Bundle (.aab file)
Then fill out your release notes, clearly, describing what exact features must be verified.
Click Save , Review release and then Start rollout for Closed testing.
Crucial Timing Factor: Your app will, pretty much instantly, land in the “Pending Review” state. Google’s internal crew really has to inspect and approve this first build before it’s even downloadable by anyone. The whole thing can take like 48 hours, or sometimes a few days. And please don’t include those days inside your 14-day testing window, because they don’t count.
Step 3: Distribution and Onboarding
Once the console status switches to Active, scroll to the bottom of the Testers tab.
Copy the Join on Android or Join on the web link.
Share this exact link with your designated testers.
The Critical Action: Every tester must click the link on their device, log in with their whitelisted Gmail account, click Accept Invitation, and download the app directly via the private Play Store link.
The official 14-day consecutive countdown only begins when at least 12 testers have successfully installed the app and completed this opt-in process.
Eliminating Testing Negligence: The Human Factor
The absolute number one cause of closed testing failure is relying on casual testing from friends and family. While they mean well, their behavior typically ruins your data stream.
To ensure your test track passes Google's automated audit, you must strictly manage your testers and eliminate these common behaviors:
1. Beware of Sudden Uninstalls
Friends and family members frequently clear up storage space on their phones without thinking. If a tester uninstalls your app on day 8 and your count of active, opted-in installations drops to 11, your 14-day streak is broken instantly. You will have to reset the clock. Always recruit 15 to 20 testers so that a few sudden uninstalls won't drop you below the mandatory minimum of 12.
2. Implement a Daily 2-to-3 Minute Interaction Rule
Instruct your testing pool that simply opening and closing the app is completely useless. Google's algorithm flags shallow sessions as "fake testing." Your testers need to actively engage with the app for a minimum of 2–3 minutes every single day. They should enter data, trigger animations, toggle settings, and simulate genuine user behavior.
3. Explore Every Single Page
Make sure your testing group, like really, systematically wanders through each view, menu, and layout in your app. Google, as you know, collects screen views using its internal Play Services telemetry, but it’s basically tracking what they can see. So if your app has five tabs yet your testers only stay on the home screen for two weeks, that ends up showing the app wasn’t evaluated enough for stability and overall quality.
4. Absolutely Avoid Web-Based and Emulator Testing
Do not allow your testers to use cloud-based Android emulators, BlueStacks, or browser-based testing environments to fulfill their daily usage requirements. Google detects the device hardware signature. If your sessions are originating from virtual machines rather than physical devices with active SIM cards or unique hardware IDs, your production application will face a swift, unappealable rejection.
Proactive App Maintenance During the 14 Days
A perfectly static testing track looks incredibly suspicious to a Google reviewer. In real-world software development, a new app always has minor bugs, formatting issues, or UI quirks.
To prove to Google that you are running a genuine development cycle, you should actively maintain the application during the test:
Collect real bug reports from your testers.
Implement minor fixes or optimization tweaks in your codebase.
Somehow compile and upload at least one updated app bundle (.aab version) to your closed testing track, mid way through those 14 days. Make sure it’s not the very end, ok?
When you eventually fill out your production access questionnaire, you can point directly to these updates as concrete proof of a rigorous, iterative testing workflow.
The Smart Alternative: Secure Professional Testing Early
Coordinating a decentralized group of 15 people, tracking their daily usage logs, and constantly reminding them not to delete your app for half a month is an exhausting administrative burden. For solo developers and independent studios, it is a massive distraction from actual product development.
If you cannot afford to risk a 14-day rejection loop, the most reliable path forward is to secure a professional closed testing service before you launch your track.
By leveraging verified networks of real-world testers who use distinct, physical Android devices, you ensure your app hits every single engagement metric Google requires. Professional testers provide genuine session lengths, thoroughly navigate every page of your user interface, and supply the real bug reports you need to confidently answer Google's production questionnaire. Putting resources into pro testing early helps keep your project safe from expensive launch stumbles and, kind of guarantees your app moves cleanly from a closed lane right into production, you know. It’s like less waiting around later, more steady forward momentum from the start.
About the Author

Pratyush Kumar Thakur
Expert software tester and contributor to the community. Passionate about AI, automation, and user experience.