
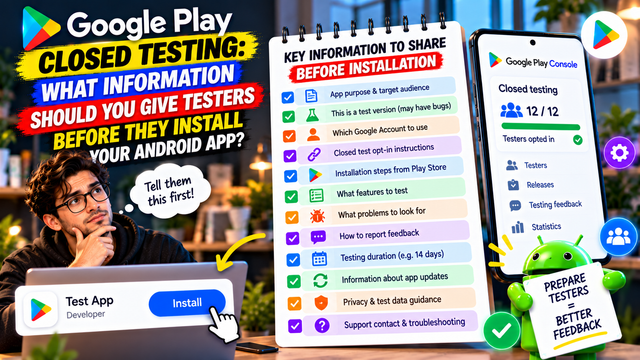
Learn what information to give Android app testers before installation, including Google Account requirements, opt-in steps, testing tasks, feedback instructions, updates, and troubleshooting.
Getting testers for your Android app is one thing. Getting them properly prepared to test it is another.
Sending someone a Google Play testing link with a message saying “Please install and test” isn't exactly a professional testing strategy. It gives testers a link, but not much context about what they're supposed to do with it.
A better approach is to give testers the important information before they install your app.
For eligible personal developer accounts created after November 13, 2023, Google requires at least 12 testers to remain continuously opted in to a closed test for at least 14 days before you can apply for Production Access. Google also recommends giving testers clear testing instructions, explaining what feedback you want, encouraging them to use the app's features, and providing a clear feedback channel.
This guide explains exactly what you should tell your testers before they install your Android app.
Why Tester Instructions Matter
Your testers may be familiar with Android, but that doesn't mean they automatically understand your testing process.
Without proper instructions, you may encounter questions such as:
Which Google Account should I use?
Where do I join the test?
Is this the normal Play Store version?
What exactly should I test?
Where should I report bugs?
Should I test every feature?
What happens if the app crashes?
How do I know I've successfully joined the test?
Answering these questions upfront makes your testing process much smoother.
It also means you're spending less time explaining the same thing individually to every tester.
1. Explain That This Is a Test Version
Start by making one thing clear:
This is a pre-release version of the app.
Tell testers that they may encounter:
Bugs
Crashes
Incomplete features
Performance issues
Unexpected behavior
UI changes
Frequent updates
For example:
“This is a pre-release version of the app. You may encounter bugs or incomplete functionality during testing. Please report anything unusual so we can improve the app before production.”
This sets the right expectations.
Don't present a test build as if it's already a perfect production application. That would make the existence of the test rather impressive in its own pointless way.
2. Explain Who the App Is For
Give testers a short description of the intended audience.
For example:
“This app is designed for students who want to organize their daily study schedules.”
Or:
“This app helps fitness users track workouts and monitor their progress.”
This gives testers context when evaluating the experience.
A tester who understands the target audience can provide more relevant feedback.
Google recommends recruiting testers who represent your intended future audience because their feedback is more useful for identifying usability problems and issues affecting real users.
3. Tell Them Which Google Account to Use
This is one of the most important technical instructions.
Google states that users need a Google Account or Google Workspace account to join a test.
Tell testers to use the Google Account they intend to use for the test.
A simple instruction could be:
Please use the same Google Account that you normally use on your Android device when joining the closed test.
This can prevent confusion when the tester receives the invitation on one account but tries to access the test using another.
4. Provide the Correct Testing Link
Give testers the appropriate link for your closed test.
Google's closed-testing setup allows developers to share a testing link with testers. If you're using a Google Group, testers must join the group before opting into the test.
Your instructions should clearly identify the link:
Step 1: Open the closed-test link.
Step 2: Sign in with the correct Google Account.
Step 3: Complete the opt-in process.
Step 4: Open the Play Store link and install the test version.
Don't bury the link inside a giant paragraph.
Put it somewhere obvious.
5. Explain the Opt-In Process
Installing the app isn't the same thing as joining the closed test.
Make sure testers understand that they need to opt in.
A simple explanation:
“First, open the testing link and select the option to join the test. After successfully opting in, install the app through Google Play.”
For a closed test using a Google Group, users must join the specified group before opting into the test.
6. Tell Them What Happens After They Opt In
Testers should know what to expect after joining.
Explain:
They opt into the test.
They access the test version through Google Play.
They install the app.
They use the app during the testing period.
They report bugs and feedback.
They may receive updated test versions.
Google notes that once testers install the app, their app can automatically update to the test version when updates are released.
This prevents testers from assuming that every update requires a completely new installation.
7. Tell Them How Long the Testing Period Is
If you're running the closed test to satisfy the Production Access requirement, explain the testing timeline.
For eligible personal developer accounts, Google requires at least 12 testers to remain continuously opted in for at least 14 days before applying for Production Access.
Tell testers something like:
“Please remain opted into the closed test continuously during the testing period. Do not opt out and rejoin unless instructed.”
This is important because Google explains that if a tester opts out and later opts back in, the 14-day period must be consecutive to count toward the requirement.
8. Explain What They Should Test
Never assume testers will automatically explore everything.
Give them a basic feature checklist.
For example:
Account
Sign up
Login
Logout
Password recovery
Main Features
Feature 1
Feature 2
Feature 3
Navigation
Home
Search
Menus
Back navigation
Settings
Profile
Preferences
Notifications
Other Important Areas
Payments
Sharing
Uploads
Downloads
Offline functionality
Only include features that actually exist in your app.
The purpose is to make sure testers explore the areas that matter.
Google specifically recommends encouraging testers to use as many available features as possible so you can receive more holistic feedback.
9. Explain What Kind of Problems to Look For
“Find bugs” is too vague.
Tell testers what counts as useful feedback.
Ask them to watch for:
Functional Problems
Buttons not working
Features failing
Incorrect results
Broken links
Login problems
Performance Problems
Slow loading
Freezing
Unexpected delays
Crashes
User Experience Problems
Confusing screens
Difficult navigation
Unclear instructions
Hard-to-find features
Visual Problems
Text overlapping
Incorrect spacing
Images not loading
Screen elements appearing incorrectly
Device Problems
Issues on specific Android versions
Problems on certain screen sizes
Device-specific crashes
This gives testers a much clearer idea of what you're asking them to notice.
10. Tell Them How to Report a Bug
Before installation, testers should know exactly where to send feedback.
Google recommends providing a clear feedback channel such as:
Email
Website
Messaging forum
Testers can also submit private feedback through Google Play.
Choose one primary channel for your testing group.
For example:
Feedback: Google Form
Technical issues: Email
Urgent problems: Testing group
Don't create seven different channels unless you enjoy reconstructing missing information from digital archaeology.
11. Give Them a Simple Bug-Reporting Format
Make feedback easy to understand.
Ask testers to provide:
Feature:
Problem:
Steps to reproduce:
Expected result:
Actual result:
Device:
Android version:
Screenshot/video:
For example:
Feature: Login
Problem: OTP doesn't arrive
Device: Pixel 8
Android: Android 16
Steps: Enter phone number → request OTP → wait 60 seconds
Result: OTP not received
That is much more useful than:
“Login doesn't work.”
12. Tell Testers What You Expect From Their Usage
Your testers should understand that you want realistic use, not just installation.
Tell them to use the app according to the way a normal user would.
For example:
“Please explore the app naturally and complete the main tasks a typical user would perform. Try different features and report anything confusing, broken, slow, or unexpected.”
Google's guidance specifically asks developers to consider whether tester usage matched expected production behavior.
The goal isn't to manufacture activity.
The goal is to learn how real users experience your application.
13. Tell Them About App Updates
Your testers may receive new versions during the closed test.
Explain that:
Bugs may be fixed during testing
New versions may be released
They may need to retest previously reported problems
They should keep the test version updated
Example:
“We may release updates during the testing period. When a new version becomes available, please update the app and retest the features mentioned in the update message.”
This turns testing into a continuous improvement process.
14. Explain What to Do If the App Crashes
Give testers a simple crash-reporting process.
For example:
“If the app crashes, reopen it and try the same action again. If the crash happens again, report the steps that caused it and include your device model and Android version.”
If possible, ask them to provide a screen recording or screenshot.
This can dramatically reduce the time required to reproduce problems.
15. Tell Them What to Do If Installation Fails
Give testers a short troubleshooting section.
If the app isn't visible:
Confirm they are using the correct Google Account.
Confirm they completed the opt-in process.
Confirm they are using the correct testing link.
Check whether the test has been published.
Google notes that after a test is first published, the testing link can take several hours to become available.
If you're using a Google Group:
Confirm that the tester has joined the group before attempting to opt into the test.
This small troubleshooting guide can save you from answering the same question 14 times.
16. Tell Testers About Privacy and Test Data
If your app handles personal information, explain what testers should and shouldn't enter.
For example:
“Please do not use real financial information during testing.”
Or:
“Use the test account provided rather than entering sensitive personal information.”
If your app requires test credentials, provide them securely and explain how they should be used.
Google also requires developers to provide valid working login credentials in Play Console when an app requires authentication so reviewers can fully test the app.
17. Explain Any Known Limitations
If you already know about a problem, tell testers.
For example:
“Known issue: Push notifications may be delayed on some devices. We're currently investigating this.”
This prevents testers from repeatedly reporting the same known problem without context.
However, don't use a “known issues” list as an excuse to ignore serious problems.
Testing exists precisely so you can discover and fix issues before production.
18. Tell Testers What Not to Do
Depending on your application, some boundaries may be useful.
For example:
Don't share private test links publicly.
Don't publish confidential screenshots.
Don't enter real payment information.
Don't share test credentials.
Don't use production customer data.
Don't intentionally abuse or attack the application unless security testing is part of the assignment.
Keep these instructions relevant to your app.
19. Give Them a Testing Schedule
Instead of asking testers to “test everything,” give them a simple plan.
Days 1–2
Installation & onboarding
Install app
Sign up
Login
Complete setup
Days 3–5
Core features
Main workflows
Primary functionality
Common user actions
Days 6–8
Navigation & usability
Menus
Search
Settings
Screen transitions
Days 9–11
Real-world usage
Normal usage
Notifications
Network changes
Longer sessions
Days 12–13
Retesting
Verify bug fixes
Test updated features
Day 14
Final review
Complete main user journey
Test important features
Report remaining issues
This gives your testers direction without turning them into unpaid software engineers.
20. Tell Them How to Contact You
Your onboarding message should end with a clear support method.
For example:
Need help?
Contact: [email protected]
Please include your Google Account email, device model, Android version, and a description of the problem.
This makes troubleshooting much easier.
A Complete Pre-Installation Message for Testers
You can send testers something like this:
Welcome to our Android Closed Testing Program!
Thank you for helping us test the app before its public release.
Before installing:
1. Use the Google Account you normally use on your Android device.
2. Open the closed-testing link provided below.
3. Complete the opt-in process.
4. Install the app from Google Play.
5. Keep yourself continuously opted into the test during the testing period.
What to test:
· Sign-up and login
· Main features
· Navigation
· Notifications
· Settings
· Any other important features
What to report:
· Crashes
· Broken features
· Slow performance
· Confusing screens
· Unexpected behavior
· Device-specific problems
How to report issues:
Please use our designated feedback channel and include your device model, Android version, feature tested, steps to reproduce the problem, and screenshots or recordings when useful.
The app is a pre-release version, so you may encounter bugs or changes during testing. We may release updates throughout the testing period, so please keep the app updated and retest important fixes.
Thank you for helping us make the app better before launch!
Information Checklist: What Should Testers Know?
Before sending your tester the installation link, make sure you've covered:
Information
Needed?
App purpose
✅
Test version explanation
✅
Google Account requirement
✅
Closed-test opt-in instructions
✅
Installation instructions
✅
Testing duration
✅
Features to test
✅
Expected user behavior
✅
Bug-reporting instructions
✅
Feedback channel
✅
Update instructions
✅
Crash instructions
✅
Installation troubleshooting
✅
Privacy/test-data guidance
When applicable
Known limitations
When applicable
Support contact
✅
What You Should Avoid Sending
Avoid messages like:
“Here is the link. Install the app and test it for 14 days.”
That's technically a message. It is not particularly useful.
Also avoid:
Too much technical language
Your tester doesn't need your entire development architecture.
Huge instruction documents
Give them the information they need, then provide additional details when necessary.
Unclear feedback expectations
Tell them what useful feedback looks like.
Multiple conflicting links
Provide one clear path to join the test.
Unnecessary daily tasks
Testing should reflect realistic use rather than artificial activity.
How This Helps Your Production Access Application
Your closed test should generate useful information that you can later use when applying for Production Access.
Google asks about:
How you recruited testers
How testers engaged with your app
Whether they used the available features
Whether their usage matched expected production behavior
What feedback they provided
How you collected that feedback
What changes you made based on testing
How you determined that the app was ready for production
A well-prepared tester onboarding process makes these questions easier to answer because you have a documented testing structure.
Your process becomes:
Prepare testers → Opt in → Install → Explore → Report → Fix → Retest → Document
That's the kind of testing process that actually teaches you something about your app.
Final Pre-Installation Checklist
Before sending the test invitation, confirm that your tester will know:
What the app does
That they're receiving a test version
Which Google Account to use
How to join the closed test
How to opt in
Where to install the app
How long the testing period is
What features to test
What problems to look for
How to report bugs
Where to send feedback
How to report crashes
What to do if installation fails
How updates will work
What information should not be entered
How to contact you for help
If testers understand all of these points before installation, your testing process will be considerably easier to manage.
Conclusion
A good tester doesn't begin testing when they tap Install.
They begin testing when they understand what they're testing, why they're testing it, what to look for, and how to report what they find.
For eligible personal developer accounts, Google requires at least 12 testers to remain continuously opted in for 14 days before you can apply for Production Access. But simply reaching that number isn't the whole process. Google also looks at tester engagement and asks developers to explain how testers used the app, what feedback they provided, and what improvements were made during testing.
So before you send your testing link, give testers the information they need:
Purpose → Account → Opt-in → Installation → Testing Tasks → Feedback → Updates → Support
A few minutes spent preparing testers can save hours of confusion later.
And, mercifully, fewer messages saying “Sir, app kaha se install karni hai?” 😄
FAQs
1.What should I tell testers before they install my Android app?
Explain the app's purpose, that it is a test version, how to opt in, which Google Account to use, what features to test, what problems to report, and where to submit feedback.
2.Do testers need a Google Account?
Yes. Google states that users need a Google Account or Google Workspace account to join a test.
3.Should testers know the testing period before joining?
Yes. If you're completing the closed-test requirement for Production Access, tell testers that they need to remain continuously opted in for at least 14 days.
4.What feedback should testers provide?
Ask for specific feedback about crashes, broken functionality, performance, usability, navigation, unexpected behavior, and device-specific issues.
5.Can testers submit feedback directly through Google Play?
Yes. Testers can provide private feedback through Google Play, and developers can also provide a direct feedback channel such as email, a website, or a messaging forum.
6.Should I give testers a testing checklist?
Yes. A focused checklist helps testers explore important features instead of simply installing the app and disappearing into the digital wilderness.
7.What if a tester can't find my closed-test app?
Check that the tester is using the correct Google Account, has completed the opt-in process, and is using the appropriate test link. Google also notes that a newly published test link can take several hours to become available.
About the Author

Saksham Goyal
Expert software tester and contributor to the community. Passionate about AI, automation, and user experience.