
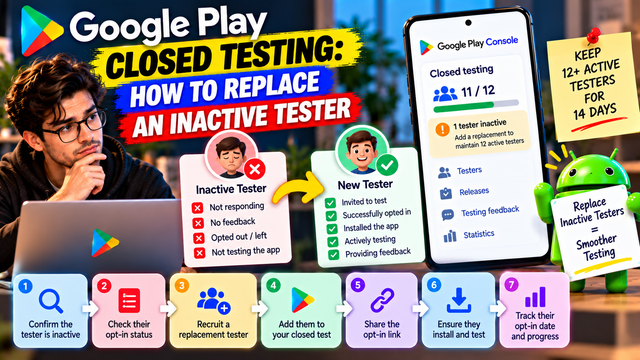
Learn how to replace an inactive tester during Google Play Closed Testing, track opt-in dates, recruit replacements, maintain tester engagement, and protect your 14-day testing progress.
You start your Google Play Closed Test with 15 testers.
Everyone joins.
Everyone is enthusiastic.
Then, three days later, one tester disappears into the digital wilderness.
Another stops responding.
Someone says, “I’ll test it tonight.”
They never do.
Now you are wondering: Can I replace an inactive tester without ruining my testing progress?
The short answer is yes, you can add another tester, but there is an important distinction: a replacement tester does not inherit the inactive tester's testing days.
For personal developer accounts created after November 13, 2023, Google requires at least 12 testers to remain continuously opted in for at least 14 days before you can apply for Production Access. If a tester opts out and later opts back in, their 14-day period must be consecutive.
That means tester replacement needs to be handled carefully.
What Counts as an Inactive Tester?
Google's published requirements focus on continuous opt-in and tester engagement, rather than providing a specific official definition of an "inactive tester."
A tester might become practically inactive if they:
Stop responding to messages
Never provide feedback
Do not test the requested features
Leave the testing group
Opt out of the test
Cannot install or access the app
Become unavailable during the testing period
Do not automatically assume that someone is inactive simply because they did not message you today.
Google encourages developers to give testers clear testing instructions, specify the feedback they want, encourage use of as many features as possible, and provide a clear feedback channel.
Why Replacing an Inactive Tester Matters
Suppose you started with exactly 12 testers.
After several days, one tester opts out.
You now have only 11 continuously opted-in testers.
That can become a problem because Google requires at least 12 testers to have been continuously opted in for the preceding 14 days when you apply for Production Access.
This is why recruiting slightly more than the minimum can provide a useful safety buffer.
For example:
15 testers recruited → 13 remain active/opted in → 12 needed
That is much less stressful than:
12 testers recruited → 1 leaves → panic
Humanity has invented cloud computing, yet somehow this is still how software projects operate.
Step 1: Confirm Whether the Tester Is Actually Inactive
Before replacing someone, check what happened.
Send a simple message:
Hi! We're currently continuing the closed testing for the app. Please confirm whether you're still participating in the test and whether you've been able to access and use the latest version.
Give the tester a reasonable opportunity to respond.
They may have:
Changed phones
Used the wrong Google Account
Missed the opt-in step
Had an installation problem
Not understood what they were expected to test
Simply forgotten
Do not remove someone merely because they did not send a message immediately.
Step 2: Check Their Opt-In Status
The first thing to establish is whether the tester is still opted in.
Google states that testers who opt in, test for fewer than 14 days, and then opt out do not count toward the requirement. If they opt back in later, their 14 days must be consecutive.
This is different from simply receiving an invitation.
Your tracking sheet should distinguish between:
Status
Meaning
Invited
Tester received the invitation
Pending
Tester has not completed the opt-in process
Opted In
Tester joined the closed test
Testing
Tester is participating
Needs Follow-Up
Tester has not responded recently
Opted Out
Tester left the test
Replacement Needed
You need another tester
This prevents you from confusing an invited tester with an actually opted-in tester.
Step 3: Check Your Tester Count
Before removing anyone, look at your current testing situation.
For example:
Situation A: You have 18 testers
One tester becomes inactive.
You still have enough people in your testing group to maintain a healthy buffer.
You can keep the tester list organized and bring in another tester if needed.
Situation B: You have exactly 12 testers
One tester opts out.
Now you have 11 continuously opted-in testers.
You should bring in another tester as soon as possible, but remember that the new tester does not inherit the departed tester's completed days.
Situation C: Several testers drop out
If multiple testers stop participating or opt out, reassess your testing group rather than assuming the original schedule is still safe.
Step 4: Recruit a Replacement Tester
Find a tester who matches your app's intended audience as closely as practical.
For example:
Fitness app
Look for people who actually use fitness or wellness apps.
Productivity app
Recruit people who regularly use task-management or productivity tools.
Shopping app
Recruit people who regularly shop through mobile applications.
Gaming app
Recruit people who actually play the type of game you're testing.
Google recommends testers who can provide useful feedback and encourages developers to have testers use as many features as possible.
The goal is not merely to fill a number.
The goal is to improve the quality of your test.
Step 5: Add the New Tester to Your Closed Test
Google Play lets you manage closed-test testers through email lists or Google Groups.
For an email-based test:
Sign in to Play Console.
Select your app.
Go to Test and release → Testing → Closed testing.
Select Manage track.
Open the Testers tab.
Add the new tester to your email list.
Save your changes.
Share the testing opt-in link with the new tester.
Google also supports Google Groups for closed testing. Only members of the specified group can join that test.
Step 6: Make Sure the New Tester Actually Opts In
Adding an email address to your tester list is not the same thing as completing the testing process.
The tester still needs to follow the opt-in process.
For a closed test, Google provides a shareable opt-in link. Each tester needs to opt in using the link. If you are using a Google Group, the tester must join the group before opting into the test.
Send the tester clear instructions:
1. Join the tester group, if applicable
↓
2. Open the closed-test opt-in link
↓
3. Accept the invitation
↓
4. Install the app
↓
5. Use the app and test the requested features
↓
6. Submit useful feedback
Do not assume that because you sent the link, the tester completed the process.
Step 7: Record the New Tester’s Opt-In Date
This is one of the most important steps.
Record:
Tester name
Google Account
Device
Android version
Date invited
Date opted in
Testing status
Feedback received
For example:
Tester
Opt-In Date
Status
T01
Oct 15
Active
T02
Oct 15
Active
T03
Oct 16
Active
T04
Oct 22
Replacement
T05
Oct 15
Active
The new tester's date is their own starting point.
They do not inherit the previous tester's days.
Step 8: Give the Replacement Tester a Proper Onboarding Message
Do not simply send:
“Here is the link. Please test.”
That is not a testing strategy.
Give them clear instructions covering:
What the app does
Who it is for
How to opt in
Which Google Account to use
How to install it
Which features to test
What problems to look for
How to report bugs
Where to send feedback
How long the test will run
Google specifically recommends clear testing instructions and a clear feedback channel.
Step 9: Give the Tester Specific Tasks
A replacement tester should not wander around the app randomly and then report:
“Everything looks good.”
Instead, give them a checklist.
Example testing checklist
Account
Create account
Log in
Log out
Reset password
Main Feature
Complete the primary workflow
Test different inputs
Try unusual cases
Navigation
Open every major screen
Use back navigation
Switch between sections
Performance
Check loading times
Test on mobile data
Test on Wi-Fi
Notifications
Trigger notifications
Open notifications
Test deep links
Feedback
Report crashes
Report confusing screens
Report broken features
Suggest usability improvements
This produces much more useful testing data.
Step 10: Don't Expect the Replacement to "Catch Up"
This is where many developers misunderstand the 14-day requirement.
Imagine:
Original tester opted in on October 15
Tester left on October 22
Replacement opted in on October 22
The replacement does not suddenly become a seven-day tester.
Their own continuous testing period starts from their opt-in.
Google's rule is based on testers being continuously opted in for the required period. If a tester opts out and later opts back in, the 14 days must be consecutive.
So replacements should be treated as new participants.
Step 11: Keep a Backup Tester Pool
The safest strategy is not to wait for a tester to disappear.
Keep a small backup pool.
For example:
Primary testers: 15
Backup testers: 3–5
When someone becomes unavailable:
Inactive tester → Follow-up → Confirm status → Add replacement → Send opt-in link → Record new opt-in date
This makes the process much more predictable.
Step 12: Track Everything in One Sheet
A simple tracker can look like this:
ID
Tester
Account
Device
Opt-In
Days
Feedback
Status
T01
Rahul
Gmail
Pixel 8
Oct 15
14
Received
Active
T02
Priya
Gmail
Samsung
Oct 15
14
Received
Active
T03
Amit
Gmail
OnePlus
Oct 16
13
Received
Active
T04
Neha
Gmail
Redmi
Oct 22
7
Received
Replacement
T05
Karan
Gmail
Pixel
Oct 15
14
—
Needs follow-up
Keep the spreadsheet updated throughout the test.
This becomes particularly useful when you need to explain your testing process later.
What If the Tester Is Still Opted In but Not Very Active?
This requires some judgment.
Do not automatically remove them.
Instead:
Contact the tester.
Give them specific tasks.
Ask for feedback.
Confirm they remain opted in.
Monitor their participation.
Document what you observe.
Google's guidance emphasizes tester engagement and encourages testers to use as many features as possible and provide feedback.
The goal is useful testing, not artificially manufacturing activity.
What If a Tester Opts Out?
This is more serious for the 14-day requirement.
Google explicitly states that a tester who opts out before completing 14 days does not count toward the requirement. If they opt back in later, the 14-day period must be consecutive.
So if you had exactly 12 qualifying testers and one opts out:
12 → 11
You should recruit another tester rather than assuming the original tester's previous days will somehow transfer.
They won't.
Can You Remove the Inactive Tester?
You can manage who has access to your closed test through the tester lists or Google Groups.
However, removing an inactive tester from your list is not the same thing as making their testing history disappear or transferring their testing days to another person.
The important issue is maintaining the required number of continuously opted-in testers.
Google's documentation provides controls for managing closed-test testers through email lists and Google Groups.
Should You Replace a Tester Who Is Quiet?
Not necessarily.
There is an important difference between:
Quiet tester
and
Tester who has opted out or is no longer useful to the test.
A quiet tester may still be opted in and participating.
Before replacing them, try:
Sending a reminder
Giving a specific testing task
Asking for structured feedback
Confirming they can access the latest version
Checking whether they encountered an installation issue
If they remain unavailable, then consider your backup tester.
How to Prevent Tester Drop-Off in the First Place
Replacing testers is useful.
Preventing unnecessary drop-off is better.
1. Recruit people who actually fit the app
People are more likely to test an app they understand or would realistically use.
2. Explain the commitment upfront
Tell testers that the closed test has a defined testing period.
3. Keep instructions simple
Do not send a 4,000-word technical manual to someone who volunteered for ten minutes of testing.
4. Give testers specific tasks
People respond better to:
“Test signup, login and password recovery.”
than:
“Please test the app.”
5. Make feedback easy
Give them one clear place to report problems.
6. Communicate important updates
When you release a meaningful fix, tell testers what changed and what should be retested.
Google recommends continuing closed testing while resolving reported issues and bugs.
Example Replacement Workflow
Imagine you started your test with 15 testers.
Day 1
15 testers invited.
Day 2
13 testers successfully opted in.
Day 4
One tester cannot install the app.
You contact them.
Day 5
They confirm they cannot continue.
You recruit a replacement.
Day 5
Replacement receives the opt-in instructions.
Day 6
Replacement opts in and installs the app.
Day 7–14
Replacement continues testing.
Meanwhile, your original testers continue their own testing periods.
The key point is that the replacement has their own opt-in timeline.
A Simple Replacement Checklist
Before considering the replacement complete, verify:
Tester confirmed participation
Correct Google Account confirmed
Tester added to the closed-test list or group
Tester received the opt-in link
Tester successfully opted in
Tester installed the app
Tester knows what to test
Tester knows where to submit feedback
Opt-in date recorded
Device recorded
Android version recorded
Testing status updated
Feedback documented
What You Should Not Do
Avoid these common mistakes.
Don't create fake tester activity
The purpose of closed testing is to identify problems and improve the app.
Don't assume installation equals meaningful testing
A tester installing the app once is not the same as providing useful testing feedback.
Don't transfer testing days
A new tester starts their own continuous opt-in period.
Don't remove people without checking their status
They may simply have an access or installation problem.
Don't wait until the last day
If your tester count is already below the required level, waiting creates unnecessary risk.
Don't treat the 12-tester requirement as automatic approval
Meeting the testing requirement allows you to apply for Production Access. It does not guarantee approval.
Google can assess your testing process, app, and production readiness, and may require additional testing.
Can a Managed Testing Platform Help?
If managing recruitment, replacements, tester communication, opt-in tracking, and feedback is becoming a project of its own, a dedicated testing platform can reduce the administrative workload.
For example, inTesters provides tools and tester-management services focused on Google Play closed testing.
The important distinction is that no third-party testing service should be presented as a guarantee of Google Production Access. Google makes the final decision based on its own requirements and review.
Final Strategy: Never Depend on Exactly 12 Testers
The biggest lesson is simple:
Do not build your entire testing plan around the exact minimum.
Instead:
Recruit → Confirm → Opt In → Track → Test → Monitor → Replace when necessary → Document
A practical buffer gives you room to handle real-world problems.
Because testers have jobs, phones break, notifications get ignored, and apparently everyone occasionally forgets the thing they explicitly agreed to do.
Your job is to build a process that survives those realities.
Final Checklist
Before and during your Google Play Closed Test:
Recruit more than the minimum where practical
Keep a backup tester pool
Track every tester's Google Account
Track opt-in dates
Confirm testers actually opt in
Monitor tester engagement
Follow up with quiet testers
Replace testers who genuinely become unavailable
Never transfer testing days to replacements
Give replacements clear onboarding instructions
Assign specific testing tasks
Track device and Android-version information
Collect structured feedback
Document bugs and fixes
Continue testing while resolving issues
Keep records for your Production Access application
Conclusion
Replacing an inactive tester during Google Play Closed Testing is not complicated, but it needs to be handled correctly.
The most important rule is this: a replacement tester is a new tester with their own continuous opt-in period.
For developers subject to Google's testing requirement, at least 12 testers must have remained continuously opted in for 14 days when applying for Production Access.
So don't wait until your tester count becomes a crisis.
Recruit a buffer, monitor participation, communicate clearly, keep replacement testers ready, and maintain accurate records throughout the test.
A good tester-management process does more than protect your timeline. It also gives you better feedback, better bug detection, and a much stronger foundation for your eventual production launch.
FAQs
1.Can I replace an inactive tester during a Google Play Closed Test?
Yes. You can add another tester through your closed-test email list or Google Group. The new tester must complete the opt-in process themselves.
2.Does a replacement tester inherit the previous tester's testing days?
No. The replacement tester has their own continuous opt-in period. Google requires the relevant testers to have been continuously opted in for the preceding 14 days.
3.What happens if one of my 12 testers opts out?
You may fall below the required 12 continuously opted-in testers. You should recruit another tester, while remembering that the replacement starts their own testing period.
4.Can I add testers through a Google Group?
Yes. Google Play supports Google Groups for closed testing. Testers must be members of the specified group before opting into the test.
5.Should I recruit more than 12 testers?
Recruiting additional testers can provide a useful buffer against people becoming unavailable or opting out. It does not change Google's requirement that the qualifying testers have been continuously opted in for the required period.
6.Does Google require testers to open my app every day?
Google's published requirement focuses on continuous opt-in for at least 14 days and tester engagement. It does not state that every tester must open the app every day.
7.Should inactive testers always be removed?
No. First determine whether they are actually unavailable, opted out, or simply need clearer instructions or a reminder.
8.Can I use multiple closed-test tracks?
Yes. Google Play supports multiple closed tests, including separate tester groups for different development teams or testing purposes.
9.Does completing 14 days guarantee Production Access?
No. Completing the required closed test makes you eligible to apply for Production Access. Google also evaluates your testing, app, and production readiness.
About the Author

Saksham Goyal
Expert software tester and contributor to the community. Passionate about AI, automation, and user experience.