
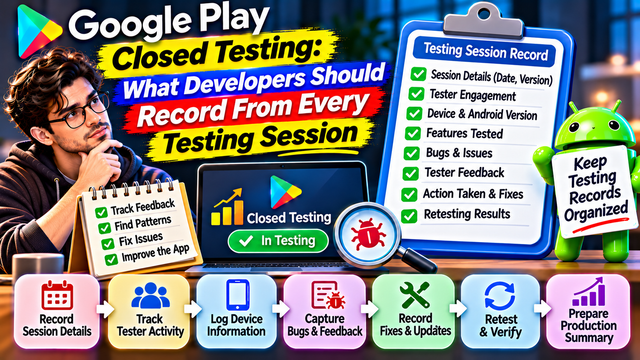
Learn what to record during every Google Play Closed Testing session, including tester engagement, device details, bugs, feedback, screenshots, fixes, and retesting results.
Google Play Closed Testing is not just about inviting testers, collecting feedback, and waiting for 14 days to pass.
It is an opportunity to understand how real people interact with your Android application, identify problems, test important features, and improve the overall user experience before production.
But there is one important thing many developers overlook: recording what actually happens during testing.
Without proper documentation, you may receive useful feedback but struggle to remember which tester reported an issue, which device was affected, what action was taken, or whether the problem was resolved.
Maintaining a testing record makes the entire process more organized. It also helps you prepare accurate answers when Google asks about tester engagement, feedback collection, and improvements made during closed testing.
In this guide, we will explain exactly what developers should record from every testing session, how to organize the information, and how to use those records when preparing for Google Play Production Access.
1. Record the Date and Session Details
Start by recording the basic information about each testing session.
This helps you understand when testing took place and which version of your application was being evaluated.
Important details include:
Testing date.
Session start and end time.
App name.
App version.
Version code.
Closed testing track.
Tester ID or reference.
Session status.
Example:
Field
Example
Testing date
14 November 2026
App name
My Shopping App
App version
1.0.2
Version code
3
Testing track
Closed Testing
Tester ID
Tester 04
Session status
Completed
Recording these details helps you connect feedback and reported problems with the correct application version.
2. Record Tester Participation and Engagement
Knowing who joined your testing group is important, but understanding how testers interacted with your application is equally useful.
Record relevant participation information, such as:
Tester reference or ID.
Whether the tester opted in.
Whether the tester installed the application.
Whether the tester opened the app.
Which features they explored.
Whether they completed assigned testing tasks.
Whether they submitted feedback.
Whether they encountered difficulties.
You can use a simple tracking table:
Tester ID
Opted In
Installed
Features Tested
Feedback
Tester 01
Yes
Yes
Login, Dashboard
Received
Tester 02
Yes
Yes
Registration, Profile
Received
Tester 03
Yes
Yes
Dashboard, Search
Pending
Tester 04
Yes
Yes
Login, Payments
Received
Important: Do not confuse tester participation with actual engagement. A tester being opted in does not automatically mean they explored the application or tested its features.
Google requires at least 12 testers to remain continuously opted in for at least 14 days for applicable new personal developer accounts. Its guidance also asks developers to explain tester engagement when applying for production access.
3. Record the Device and Android Version
Your application may behave differently across devices.
A feature that works perfectly on one smartphone might crash, freeze, or display incorrectly on another.
For this reason, record the device information associated with each testing session.
Important details include:
Device manufacturer.
Device model.
Android version.
Screen resolution, when relevant.
Available storage, when relevant.
Network type.
Device-specific issues.
Example:
Tester ID
Device
Android Version
Network
Tester 01
Samsung Galaxy
Android 14
Wi-Fi
Tester 02
OnePlus
Android 15
Mobile Data
Tester 03
Redmi
Android 13
Wi-Fi
Tester 04
Pixel
Android 15
Mobile Data
This information helps developers investigate compatibility problems and understand whether an issue affects a particular device configuration.
Avoid collecting unnecessary personal information. A tester ID is generally sufficient for organizing testing records.
4. Record Which Features Were Tested
One of the most important parts of a testing session is understanding which application features were actually used.
Do not simply write that a tester opened the application.
Record the features they explored and whether the expected functionality worked.
For example, if your app includes login, registration, profile management, search, and payments, track each feature separately.
Feature
Tested?
Result
Remarks
Registration
Yes
Passed
Account created successfully
Login
Yes
Passed
No issue observed
Dashboard
Yes
Passed
Loaded correctly
Search
Yes
Failed
Results not displaying
Profile
Yes
Passed
Details updated
Payments
No
Not tested
Testing pending
This helps you identify features that have received sufficient testing and those that still need attention.
It also gives you a more accurate understanding of whether tester usage covered the application's main functionality.
5. Record Every Bug and Technical Issue
Whenever a tester encounters a technical problem, document it.
Do not depend on memory or assume that a small issue will be easy to remember later.
Important details include:
Issue ID.
Date reported.
Tester ID.
Affected feature.
Description of the problem.
Steps to reproduce.
Expected behaviour.
Actual behaviour.
Error message.
Screenshot or screen recording.
App version.
Device information.
Current resolution status.
Example:
Field
Recorded Information
Issue ID
BUG-001
Feature
Login
Problem
App freezes after OTP verification
Expected result
User should enter the dashboard
Actual result
Loading screen remains visible
Device
Samsung Galaxy
Priority
High
Status
Under Investigation
This information gives developers a clear starting point for investigating the issue.
6. Record Tester Feedback and Suggestions
Not all useful feedback comes in the form of technical bug reports.
Testers may also share opinions about the design, navigation, loading experience, content, or missing features.
Record both positive and negative feedback.
Examples:
Navigation is confusing.
The dashboard looks clean.
The application takes too long to load.
The registration process is difficult.
The search feature needs improvement.
The buttons are not clearly labelled.
Organize feedback into categories:
Feedback Category
What to Record
User experience
Confusing screens and difficult workflows
Performance
Slow loading and freezing
Functionality
Features not working as expected
UI and design
Layout, readability, and visibility
Compatibility
Device-specific problems
Feature requests
Suggestions for future improvements
Keep the original feedback wherever possible. Add your own classification separately instead of rewriting a tester's comment as though it were their original statement.
7. Record the Steps Testers Followed
Knowing that something went wrong is useful. Knowing exactly how it happened is much more valuable.
For every important issue, record the steps required to reproduce it.
For example:
Reported issue: User cannot complete registration.
Testing steps:
Open the application.
Select Create Account.
Enter the required information.
Request OTP verification.
Enter the received OTP.
Tap Verify.
Observe the application response.
Actual result: The application displays a loading screen and does not proceed.
Expected result: The user should successfully complete registration and enter the dashboard.
This type of documentation helps developers reproduce the issue instead of wasting time trying random solutions.
8. Record Performance and Stability Observations
Performance is an important part of application quality.
During testing, record noticeable performance problems and relevant technical observations.
Pay attention to:
Application startup time.
Screen loading delays.
Freezing or unresponsive buttons.
Unexpected application closures.
Crashes.
Battery consumption, when relevant.
Excessive network usage, when relevant.
Background behaviour.
For more detailed analysis, developers can use Android development tools and available Play Console reports.
Do not rely only on tester comments such as "the app is slow." Investigate the problem using appropriate performance measurements and technical logs.
You can maintain a basic observation table:
Test Area
Observation
Status
App startup
Opens normally
Passed
Dashboard
Slight loading delay
Review
Navigation
No freezing observed
Passed
Login
Works correctly
Passed
Search
Results load slowly
Investigate
App stability
No crash observed
Passed
9. Record Network and Real-World Testing Conditions
Some application features depend heavily on internet connectivity.
A feature may work perfectly on a strong Wi-Fi connection but fail on mobile data or an unstable network.
Record the conditions under which important tests were performed.
Examples:
Wi-Fi connection.
Mobile data.
Weak network signal.
Temporary network interruption.
Switching between Wi-Fi and mobile data.
Offline behaviour, where applicable.
Example:
Feature
Network Condition
Result
Login
Wi-Fi
Passed
Login
Mobile Data
Passed
Dashboard
Weak Network
Slow
Search
Mobile Data
Failed
Profile Update
Wi-Fi
Passed
This helps developers identify problems related to network requests, timeouts, API responses, and error handling.
10. Record Screenshots, Screen Recordings, and Error Logs
Written feedback is useful, but visual evidence can make an issue much easier to understand.
Whenever possible, maintain supporting evidence for important bugs and unexpected behaviour.
Useful evidence includes:
Screenshots of error messages.
Screen recordings of failed workflows.
Crash logs.
Relevant application logs.
Performance reports.
Device information.
App version details.
Use a consistent naming system.
For example:
BUG-001_Login_Failure.png
BUG-002_Dashboard_Loading.mp4
BUG-003_Search_Error.png
BUG-004_Registration_Crash.txt
Store these files in an organized folder structure.
Remember to avoid including passwords, OTPs, payment information, or other sensitive personal data in screenshots and recordings.
11. Record the Action Taken for Every Reported Issue
Collecting feedback is only the first step.
Developers should also record what happened after an issue was reported.
For example:
Issue ID
Reported Problem
Action Taken
Status
BUG-001
Login failure
Authentication logic reviewed
Fixed
BUG-002
Slow dashboard
API requests optimized
Retesting
BUG-003
Search results missing
Search functionality updated
Verified
BUG-004
Confusing navigation
Menu labels improved
Completed
This record helps you understand whether the team has:
Investigated the issue.
Identified the root cause.
Implemented a fix.
Released an updated version.
Retested the affected feature.
Confirmed the expected behaviour.
Never mark an issue as verified without actually checking the updated application.
12. Record Retesting Results After Every Important Update
A developer may fix a reported problem, but that does not automatically mean the issue has been resolved.
Retesting is necessary.
For example, if testers report that the login process fails after OTP verification, repeat the complete login workflow after updating the application.
Record:
Original issue ID.
Updated app version.
Date of retesting.
Device used.
Testing steps.
Expected result.
Actual result.
Final status.
Example:
Field
Retesting Record
Issue ID
BUG-001
Original Problem
Login failed after OTP
Updated Version
1.0.3
Retest Result
Login completed successfully
Device
Samsung Galaxy
Final Status
Verified
Also test related functionality to make sure the fix has not introduced another problem.
13. Maintain a Daily or Session-Wise Testing Summary
At the end of a testing session, prepare a short summary of what happened.
This makes it easier to review progress throughout the closed testing period.
Here is an example:
Testing Session Summary
Field
Details
Testing Day
Day 4
Date
14 November 2026
Testers Participating
8
Features Tested
Login, Dashboard, Search
Bugs Reported
3
Issues Investigated
2
Issues Fixed
1
Retesting Completed
1
Pending Issues
2
Overall Observation
Search performance requires improvement
These are illustrative figures, not a Google reporting format.
A session summary should reflect what actually happened. If a tester did not participate or a feature was not tested, record that accurately.
Also remember that Google does not require developers to manufacture a daily session report or make every tester perform a fixed daily activity. This is a recommended documentation practice, not an additional official testing requirement.
14. Prepare a Final Testing Report Before Production Access
Once your closed testing period is complete, review the records you have maintained.
Google asks developers applying for Production Access to provide information about:
How testers were recruited.
How testers engaged with the application.
Whether testers used the available features.
Whether their usage reflected expected production behaviour.
Feedback received and how it was collected.
Changes made based on closed testing.
How production readiness was determined.
Your session records can help you answer these questions accurately.
A useful final report should include:
Testing period and app versions.
Tester recruitment and participation summary.
Features explored during testing.
Feedback collection methods.
Main issues reported.
Repeated complaints and common patterns.
Important bugs identified.
Changes made based on feedback.
Retesting results.
Remaining limitations and production-readiness assessment.
The objective is not to create an impressive-looking report filled with positive statements. It is to demonstrate what was tested, what was discovered, and what your team did about it.
15. Sample Google Play Testing Session Record
Here is a practical example of how developers can organize a testing session.
Application: Example Shopping App
Testing Version: 1.0.2
Testing Track: Closed Testing
Session Date: 14 November 2026
Testing Information
Recorded Details
Tester ID
Tester 04
Device
OnePlus
Android Version
Android 15
App Version
1.0.2
Network
Wi-Fi
Features Tested
Login, Dashboard, Search, Profile
Bugs Reported
1
Feedback Received
Search results load slowly
Evidence
Screen recording
Action Taken
Search performance investigated
Status
Under Investigation
Session Summary:
The tester successfully completed login and profile management. The dashboard worked as expected. However, search results took longer than expected to appear. The issue was documented with a screen recording and forwarded for technical investigation.
This is a simple example of useful testing documentation. Your actual records should contain the information relevant to your application.
16. Common Documentation Mistakes Developers Should Avoid
Mistake
Better Approach
Recording only the number of testers
Track actual engagement and features tested
Forgetting app version details
Record version name and version code
Ignoring device information
Document device model and Android version
Writing vague bug descriptions
Include steps to reproduce
Collecting feedback without classification
Group feedback into useful categories
Forgetting to record fixes
Maintain an issue-resolution history
Marking issues fixed without testing
Record actual retesting results
Losing screenshots and logs
Organize evidence using issue IDs
Reporting unverified improvements
Use accurate testing records
Collecting unnecessary personal data
Keep records focused on testing
17. Final Checklist: What to Record From Every Testing Session
Use this checklist to organize your Google Play Closed Testing process.
Session Information
Testing date and session details.
App name and version.
Version code and testing track.
Tester reference or ID.
Tester Information
Opt-in status.
Installation status.
Participation and engagement observations.
Features explored.
Feedback submitted.
Device Information
Device manufacturer and model.
Android version.
Network conditions.
Relevant compatibility observations.
Testing Results
Features tested.
Expected and actual results.
Bugs and technical issues.
Performance observations.
Screenshots and recordings.
Error logs, where relevant.
Issue Management
Issue classification.
Priority.
Root-cause investigation.
Action taken.
Updated app version.
Retesting results.
Final issue status.
Reporting
Session summary.
Repeated feedback patterns.
Improvements made.
Remaining issues.
Production-readiness observations.
Conclusion
Recording every Google Play testing session helps developers turn scattered tester comments into useful information.
It allows you to understand how people interact with your application, identify recurring problems, investigate technical issues, track improvements, and verify whether important fixes actually work.
More importantly, maintaining accurate records makes preparing your Google Play Production Access application much easier.
Remember:
What gets recorded can be reviewed. What gets reviewed can be improved.
Do not just count testers or wait for the 14-day period to finish. Understand what happened during testing, document the findings, and use that information to make your application more reliable before production.
Frequently Asked Questions (FAQs)
1. What should developers record during Google Play Closed Testing?
Developers should record testing dates, app versions, tester participation, device information, features tested, feedback, reported bugs, screenshots, actions taken, and retesting results.
2. Is a daily testing report mandatory for Google Play?
Google's published requirements do not prescribe a specific daily report format. However, maintaining session-wise or daily records is a useful practice for tracking tester engagement, feedback, and app improvements.
3. Should developers record every tester's device information?
Recording relevant device information is recommended, particularly when investigating compatibility, performance, and device-specific problems.
4. How can developers track tester engagement?
Maintain records of tester opt-in status, installation, features explored, testing tasks completed, and feedback received. Use these records to understand how testers interacted with the application.
5. Why should developers record app versions during testing?
Version details help developers identify which release contained a reported problem and whether the issue was resolved in a later version.
6. Are screenshots and screen recordings necessary?
They are not mandatory for every testing session, but they can provide useful evidence when investigating crashes, navigation problems, and unexpected behaviour.
7. Can testing session records help with Google Play Production Access?
Yes. They can help developers accurately summarize tester engagement, feedback collection, issues discovered, improvements made, and production readiness.
8. How long should developers keep testing records?
There is no specific universal retention period prescribed for these session logs in Google's closed-testing guidance. Keep records for as long as they are useful for development, quality assurance, troubleshooting, and supporting your testing history.
About the Author

Saksham Goyal
Expert software tester and contributor to the community. Passionate about AI, automation, and user experience.